Shopify integration in Visual Ink allows you to efficiently manage and fulfill orders from a Shopify store. To ensure a smooth order fulfillment process, it’s important to understand how to download and manage Shopify store products in your Visual Ink store. This guide will walk you through the steps to download products from your Shopify store into the connected Visual Ink store and map them to the appropriate products and designs.
To download products from Shopify
The ability to download and manage products directly with the Shopify Order Fulfillment App enables you to keep your product catalog in your Visual Ink store up-to-date with the connected Shopify store. This integration streamlines the fulfillment process by ensuring that the products you offer on Shopify are accurately reflected and managed in Visual Ink
1. Log into your Visual Ink shopify store.
2. Select Fulfill Shopify Orders from the store menu.
The Fulfill Shopify Orders page is loaded in the work area.
4. Click on the Downloads Products button.
Once downloaded, products from you Shopify store will be listed in the Products tab of the Fulfill Shopify Orders page.
Filtering Products by Status
Managing products effectively involves filtering them by their status to focus on what needs attention. Here’s how to filter products by their status.
1. Navigate to the Fulfill Shopify Orders page
2. Tick the checkboxes of all the products you want to fulfill.
3. Click on the Status field located at the top of the product list.
4. Select the desired status.
To reset the filter, select the option, “All”
Mapping Products
Mapping products is essential for ensuring that product data from Shopify integrates correctly into Visual Ink. Here’s how to map products:
1. Navigate to the Fulfill Shopify Orders page
2. Tick the checkboxes of all the products you want to fulfill.
3. Identify Unmapped Products
The status column is color-coded so that you can identify unmapped blank products and designs at a glance. Unmapped blank products/designs are highlighted in yellow.
Mapped blank products/designs are highlighted in green.
You can use the Status filter to look for unmapped products by selecting "Blank Products Needs Mapping".
These are the products that require mapping.
4. Click on th Match Product command for the product you want to map.
The Match Product popup appears containing the mapping options for the product.
5. Click on the Select Blank Product box.
The select Product popup appears.
6. Search for the mapping product and click on it to select it.
The variants of the Shopify product are matched with the variants of the selected blank product.
7. Click OK in the Match Product popup.
Mapping Designs
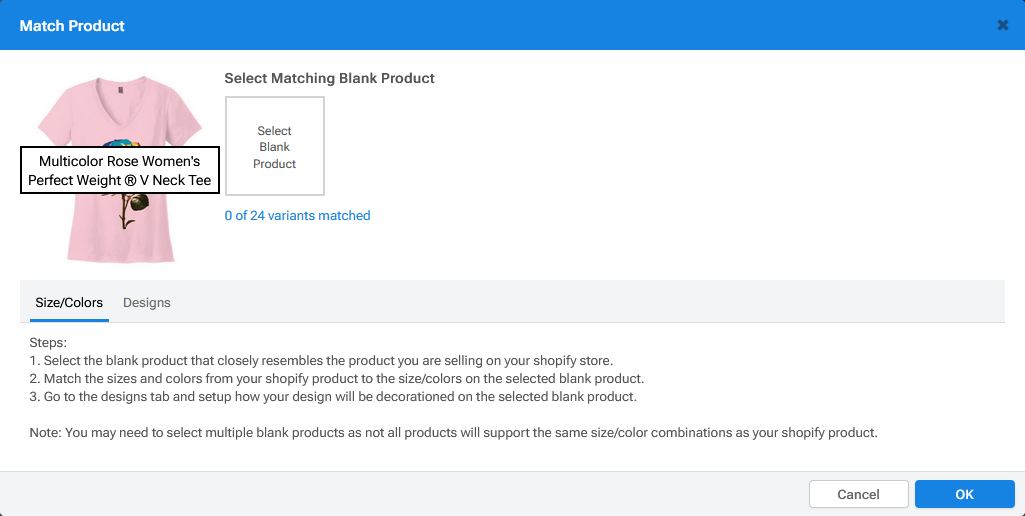
If a design was uploaded to the product in Shopify before it was downloaded into the Visual Ink store, Visual Ink will automatically recognize the design as mapped. However, if no design was uploaded, you will need to complete this step manually. Before mapping designs in Visual Ink, make sure the product is already mapped. Here’s the process for mapping designs:
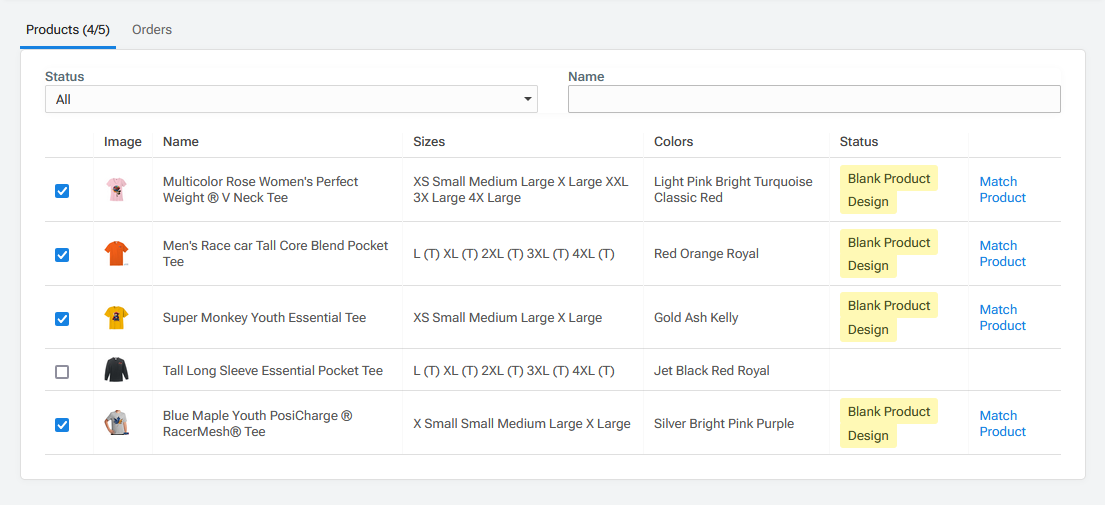
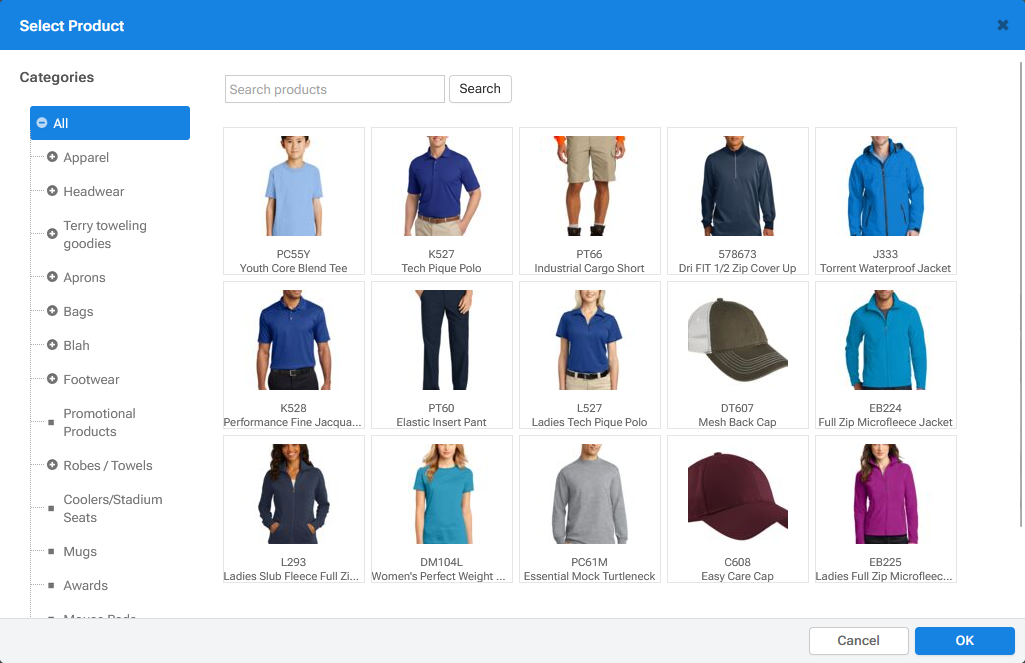
1. Confirm Product Mapping.
Make sure the product is alreay mapped. If not, refer to the tutorial above on mapping products.
Mapped products are marked with a green "Blank Product" status. Additionally, the product name appears instead of the "Match Product" command.
2. Click on the mapped product name to open the mapping options for a product.
The Match Product popup appears.
3. Select the "Designs" tab to access the design matching options.
4. Click on the Design field and choose Select/Upload Design from the dropdown list.
5. Click on the Select Design command that appears.
The Select image popup loads.
6. Select an already uploaded design or click on the Upload Files button to search for the design on you device.
7. Click OK once you have uploaded and selected the design to be mapped.
The design is placed on the product in the selected area.
You can choose the position of the design and adjust its size.
8. Adjust the Area, Process, Position and Size as necessary.
9. Click OK.